
Making your own suppositories at home offers a natural way to support your health. Many people turn to DIY wellness solutions to avoid synthetic ingredients. Homemade suppositories can deliver beneficial compounds directly where your body needs them most. This guide will walk you through safe, effective methods for creating your own suppositories using simple, non-toxic ingredients.
Understanding Homemade Suppositories
Suppositories are solid dosage forms designed to melt at body temperature. They deliver ingredients through rectal or vaginal routes. Therefore, they bypass the digestive system entirely. This method allows for faster absorption of beneficial compounds.
Natural suppositories offer several advantages over commercial options. First, you control every ingredient that goes into them. Additionally, you can customize the formula to your specific needs. However, always consult a healthcare provider before starting any new wellness routine.
Benefits of DIY Suppositories
Creating suppositories at home provides multiple health advantages. The rectal and vaginal tissues absorb nutrients efficiently. Consequently, this delivery method works faster than oral supplements in many cases.
Homemade versions eliminate unnecessary additives and preservatives. You avoid artificial colors, fragrances, and chemical stabilizers. Furthermore, you can select organic, high-quality ingredients. This approach aligns perfectly with non-toxic wellness principles.
Cost savings represent another significant benefit. Commercial suppositories often carry premium price tags. Making your own reduces expenses considerably. Moreover, you can prepare batches that last for months when stored properly.
Essential Base Ingredients
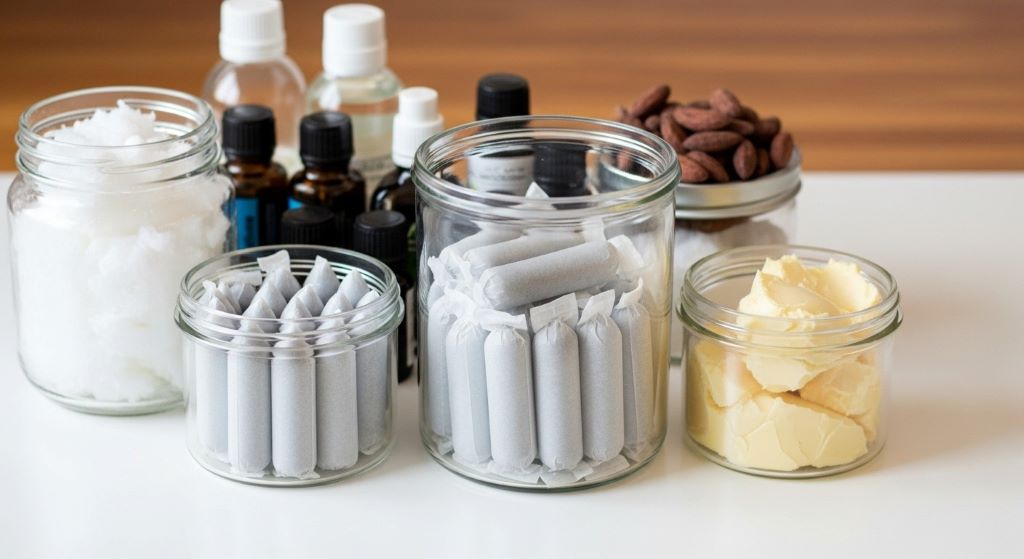
The foundation of any suppository requires a carrier base. This base melts at body temperature and holds active ingredients. Several natural options work well for homemade preparations.
Cocoa butter stands as the most popular choice. It melts around 93-97 degrees Fahrenheit, making it ideal for body temperature dissolution. Cocoa butter provides a smooth texture and easy removal from molds. Additionally, it offers moisturizing properties that benefit delicate tissues.
Coconut oil serves as another excellent base material. It solidifies at cooler temperatures and melts quickly once inserted. However, coconut oil has a lower melting point than cocoa butter. Therefore, store coconut oil suppositories in the refrigerator.
Shea butter works wonderfully for those seeking extra skin-soothing properties. It combines well with other bases to achieve the perfect consistency. According to Cleveland Clinic’s guide on alternative medicine, natural fats like shea butter support the body’s absorption of plant-based compounds.
Basic Equipment You Need
Gathering the right tools makes the process simple and hygienic. You probably already own most of these items. Start with a double boiler or heat-safe bowl over a pot of water. This gentle heating method prevents ingredient degradation.
Suppository molds create the proper shape and size. You can purchase these online or use alternatives. Ice cube trays, pill capsule molds, or silicone candy molds work in a pinch. Just ensure they produce appropriately sized doses.
A digital thermometer helps monitor temperatures accurately. Additionally, you need measuring spoons for precise ingredient ratios. Clean glass containers store your finished suppositories safely. Finally, keep parchment paper or plastic wrap handy for individual wrapping.
Step-by-Step Preparation Method
Making suppositories follows a straightforward process. Begin by assembling all ingredients and sanitizing your workspace. Cleanliness prevents contamination and ensures product safety.
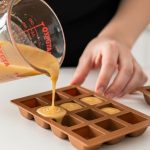
Measure your base ingredient according to your recipe. Place it in the top portion of your double boiler. Heat water in the bottom pot until it simmers gently. The base will melt slowly over this indirect heat.
Monitor the temperature carefully with your thermometer. Most bases should not exceed 120 degrees Fahrenheit. Overheating can damage beneficial ingredients you plan to add. Once fully melted, remove from heat and let it cool slightly.
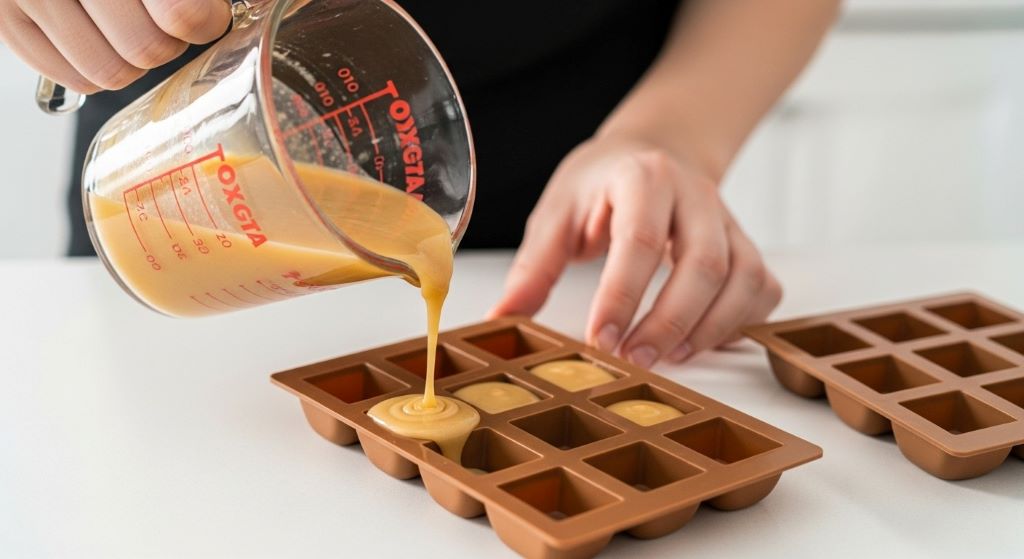
Add your chosen therapeutic ingredients while the base remains liquid. Stir thoroughly to distribute everything evenly. Pour the mixture into your prepared molds immediately. The liquid sets quickly as it cools.
Place filled molds in the refrigerator for at least two hours. This solidification time ensures proper consistency. Once firm, pop the suppositories out gently. Wrap each one individually in parchment paper or store in airtight containers.
Popular Therapeutic Additions
Many natural ingredients enhance suppository benefits. Probiotics support healthy bacterial balance in the vaginal or rectal area. Choose high-quality probiotic powders designed for this purpose. Mix them into your base just before pouring.
Herbal extracts offer targeted wellness support. Calendula soothes irritated tissues naturally. Chamomile provides gentle anti-inflammatory properties. However, always research proper dosages before adding herbs.
Essential oils require careful consideration and dilution. Tea tree oil has natural antimicrobial properties but needs proper dilution. Lavender oil promotes relaxation and comfort. Never use essential oils undiluted, as they can irritate sensitive tissues.
Vitamin E oil supports tissue health and acts as a natural preservative. It extends the shelf life of your homemade suppositories. Additionally, vitamin E provides antioxidant benefits to delicate membranes.
Safety Considerations and Precautions
Safety comes first when creating any health product. Always use food-grade or cosmetic-grade ingredients. Industrial-grade materials may contain contaminants unsuitable for internal use.
Test for allergies before using new ingredients. Apply a small amount to your inner arm and wait 24 hours. If irritation occurs, avoid that ingredient entirely. Furthermore, start with simple recipes using few ingredients.
Proper storage maintains product integrity and safety. Keep suppositories refrigerated in airtight containers. This prevents bacterial growth and maintains consistency. Label each batch with ingredients and creation date.
Never share homemade suppositories with others. Individual body chemistry varies significantly. What works for you might cause reactions in someone else. Moreover, sharing personal health products raises hygiene concerns.
Consult healthcare professionals before using suppositories if you have medical conditions. Pregnant women should seek medical advice first. People with chronic digestive or reproductive issues need professional guidance. According to Harvard Health Publishing’s wellness resources, personalized medical advice ensures safe complementary therapy use.
Storage and Shelf Life
Proper storage extends the usability of your homemade suppositories. Temperature control matters most for maintaining consistency. Store them in the refrigerator between uses. Cool temperatures prevent premature melting and maintain shape.
Glass containers work better than plastic for long-term storage. Glass does not interact with oils or other ingredients. Additionally, it cleans more thoroughly between batches. Choose containers with tight-fitting lids.
Shelf life depends on your ingredients and storage methods. Plain cocoa butter suppositories last several months when refrigerated. Adding fresh ingredients like probiotics shortens this timeframe. Generally, use homemade suppositories within three months for optimal freshness.
Watch for signs of spoilage before each use. Discoloration, unusual odors, or texture changes indicate problems. Discard any batch that looks or smells off. When in doubt, make a fresh batch instead.
Troubleshooting Common Issues
Sometimes suppositories do not turn out perfectly on the first try. Several common problems have simple solutions. Understanding these helps you adjust your technique.
If suppositories remain too soft, increase the cocoa butter ratio. Alternatively, add a small amount of beeswax for firmness. Conversely, overly hard suppositories need more oil content. Adjust proportions gradually in small increments.
Difficulty removing suppositories from molds suggests sticking issues. Freeze molds for 30 minutes before attempting removal. Additionally, lightly coating molds with coconut oil helps. This creates a barrier between the mold and your mixture.
Uneven distribution of ingredients indicates insufficient mixing. Stir your mixture longer and more thoroughly. Some heavier ingredients settle quickly. Therefore, work efficiently once everything is combined.
Customizing for Specific Needs
Different wellness goals require different formulations. Digestive support suppositories might include soothing herbs like slippery elm. Women’s health formulas often incorporate probiotics and calendula. Relaxation blends can feature magnesium and lavender.
Start with basic recipes and modify gradually. Keep detailed notes about each batch you create. Record ingredient amounts, observations, and results. This documentation helps you refine your perfect formula over time.
Consider seasonal adjustments to your recipes. Summer temperatures may require firmer bases. Winter storage is easier due to naturally cooler conditions. Adapt your storage and formulation accordingly.
Conclusion
Making homemade suppositories empowers you to take charge of your wellness naturally. This DIY approach eliminates toxic ingredients while providing targeted health support. With simple equipment and quality ingredients, anyone can create effective suppositories at home. Remember to prioritize safety, maintain cleanliness, and consult healthcare providers when needed. Start with basic recipes and gradually customize them to your specific wellness goals. Your journey toward non-toxic health solutions begins with informed, careful preparation.
Frequently Asked Questions
How long do homemade suppositories take to work?
Homemade suppositories typically begin working within 15 to 30 minutes. The exact time depends on your body temperature and the ingredients used. Suppositories with coconut oil bases may work faster than cocoa butter versions because coconut oil has a lower melting point.
Can I make suppositories without molds?
Yes, you can shape suppositories by hand or use household items. Roll the mixture into small, torpedo-shaped pieces while it is still pliable. Alternatively, use clean pill capsule molds or small silicone ice cube trays. Just ensure whatever you use creates appropriately sized doses.
Are homemade suppositories safe during pregnancy?
Pregnant women should always consult their healthcare provider before using any suppositories. Some herbs and essential oils are not safe during pregnancy. Even natural ingredients can affect pregnancy differently. Professional medical guidance ensures both maternal and fetal safety.
How do I know the right dosage for ingredients?
Research each ingredient thoroughly before adding it to your formula. Start with conservative amounts, typically one to two percent of the total mixture. Consult herbalist resources or medical literature for specific compound dosages. When uncertain, use less rather than more.
What is the difference between rectal and vaginal suppositories?
The main difference lies in their intended use and sometimes their shape. Rectal suppositories are typically bullet-shaped and designed for digestive or systemic absorption. Vaginal suppositories may be oval or rounded and target women’s health concerns. Both use similar base ingredients but may contain different therapeutic additions.
Related Topics:
The Fascinating History of Spa Culture in Different Countries


+ There are no comments
Add yours